

In 1999, almost 1 million Australian dwellings had undergone a bathroom upgrade during the previous decade, according to Australian Bureau of Statistics data on home renovations, and 66% of homes built between 1920 and 1949 had been renovated during that decade. That pattern still frames Bathroom Renovations Melbourne homeowners undertake today, especially in established suburbs where older plumbing, wiring, floor structures and waterproofing often need replacement at the same time as finishes. A bathroom quote therefore isn't just a price for tiles and tapware. It's a promise about scope, approvals, hidden work, records and warranty cover. If you compare totals without comparing those written inclusions, you're not comparing the same job. I would lock the layout, shower type, approval path and waterproofing record before you judge which quote is cheaper.
Table of Contents
- Bathroom Renovation Costs in Melbourne by Scope
- Plan the Layout and Shower Type Before Demolition
- Permits, Approvals and Who Signs Off the Work
- Waterproofing Rules Under the NCC and AS 3740
- Renovation Timeline From Strip-Out to Handover
- Choosing a Contractor and Comparing Quotes
Bathroom Renovation Costs in Melbourne by Scope
The Housing Industry Association's Kitchens & Bathrooms Report 2022/23 indicated a 13% year-on-year increase in homeowner bathroom-renovation expenditure, from $15,000 to $17,000. Treat that national figure as an anchor, not a Melbourne quotation. Your price will move with room size, structural changes, access, fixture quality, waterproofing scope and whether services move.
That distinction matters because contractors use the word renovation for very different jobs. One quote might re-tile over a sound substrate and keep every outlet in place. Another might remove linings, reframe a wall, relocate drainage through a slab, and rebuild the room. The second job carries more labour, approvals and risk, even if the finished rooms look similar in photographs.
Bathroom renovation scopes and cost drivers in Melbourne
| Renovation scope | Typical work included | Main cost driver |
|---|---|---|
| Cosmetic refresh | Repaint, new tapware, vanity swap, same layout | Vanity and tapware grade |
| Mid-range refit | New shower, tiling, toilet, same footprint | Tiling area and waterproofing scope |
| Full renovation | New layout, full waterproofing, electrical and plumbing rework | Services relocation and access |
| Structural or premium | Wall removal, relocated drains, high-end finishes | Structural engineering and custom finishes |
A cosmetic refresh works when the substrate, plumbing and waterproofing are sound and you aren't altering the room's function. It fails as a money saver if swollen cabinetry, hollow tiles, damp framing or a leaking shower base show that the room needs concealed repairs. Replacing a vanity without investigating moisture behind it can put new joinery over the problem that destroyed the old unit.
A mid-range refit keeps the footprint and service positions but replaces the wet-area surfaces. It's usually the sensible middle path where the layout works and access under the floor is limited. A full renovation buys freedom to correct poor circulation, drainage and ventilation, but every moved toilet or shower waste adds plumbing time and may add approvals. Structural or premium work adds engineering, custom fabrication and longer lead times, so small specification changes have larger cost effects.
Each step up the table adds concealed work that never appears in the finished photos: strip-out labour, substrate repair, membrane coverage, extra trades and the inspections that go with them. Two quotes carrying the same tier label can still differ on whether disposal, ventilation upgrades or waterproofing documentation sit inside the price. Read the scope column first, then the cost driver, then the exclusions list, before you weigh one total against another.
Don't ask whether a total looks high in isolation. Ask which strip-out, substrate repairs, waterproofing, trade work, approvals and disposal items that total actually includes.
The three decisions that move the price most
Room size and access control tiling quantity, strip-out difficulty and how easily trades can reach pipes. A compact ensuite on an upper floor can cost more per square metre than a larger ground-floor bathroom because materials, waste and workers all pass through a tighter path.
Moving services is the second driver. Keeping the toilet, basin and shower waste in place reduces cutting, drainage alterations and inspection complexity. Moving a waste a short distance through timber floor framing is a different proposition from cutting and reinstating a concrete slab.
Tile and fixture grade is the third driver, and the easiest to stage. You can choose a simpler tile format or standard vanity and keep sound concealed work. Cutting waterproofing, ventilation, substrate repair or licensed trade work to fund premium tapware reverses the right priorities. Set a scope tier first, price that same tier with each contractor, and record every exclusion beside the total.
Plan the Layout and Shower Type Before Demolition
Many established Melbourne suburbs contain pre-1980 housing, where a bathroom upgrade commonly becomes a services and substrate project rather than a decorative one. Old galvanised pipework, limited electrical capacity, uneven timber floors and previous leaks can all sit behind intact-looking tiles. Demolition shouldn't begin until you've decided how the replacement room drains, vents, opens and stores what people use every day.
Start with how the household uses the room. Note who showers at the same time, whether a bath is essential, where towels dry, and whether the toilet needs privacy from the basin. Those answers prevent a fashionable layout from creating daily bottlenecks. They also stop you paying to relocate services for a floor plan that only looks better on paper.
Decisions to lock in early
- Shower type. Decide between screened, enclosed and open-entry walk-in. The choice determines waterproofing extent, falls, screen fabrication and how much of the floor becomes a drainage surface.
- Waste position. Set the shower waste and grate before screeding. Its location must work with available floor structure, drainage fall and tile layout.
- Finished floor levels. Confirm tile, screed and membrane build-up against adjoining floors and door thresholds. A late level change can force a visible step or compromise falls.
- Door swing and clearance. Check that the door doesn't strike the vanity, toilet or heated towel rail, and that drawers open fully.
- Vanity and cabinetry. Fix widths, plumbing centre lines, mirror cabinet depth and power-point locations before rough-in.
- Ventilation and lighting. Position exhaust, heating, task lighting and switches while walls are still open, not after tiling begins.
The shower choice has a precise waterproofing consequence. Victorian guidance on waterproofing wet areas defines an unenclosed-shower area as the floor within a 1500 mm horizontal radius of the shower-rose connection, requires a waterstop at least 1500 mm from that connection, and requires waterproofing from the waterstop back to the waste. Removing a screen can therefore expand the treated floor area and restrict where cabinetry, thresholds and penetrations sit.
Treat the rose, waste, waterstop, screed, screen line and door as one system. If the open shower throws water toward a timber vanity or doorway, changing the screen after tiling won't cure the underlying layout. This early coordination is one of the most useful planning steps for maintaining a bathroom properly because it prevents avoidable water exposure from day one.
I would fix the shower type and waste position before ordering tiles, a vanity or a custom screen. Those products all depend on dimensions and levels that follow the drainage design. A tile selected before falls are known may need awkward cuts around the grate, while a vanity ordered before waste positions are set may need its drawers modified on site.
Permits, Approvals and Who Signs Off the Work
Victorian building approval is not a single generic tick. Victorian guidance on building standards states that the Building Act 1993, Building Regulations 2018 and Plumbing Regulations 2018 give legal effect to National Construction Code requirements, and that a building surveyor is responsible for issuing the building permit and checking compliance. Your quote should say who performs that role and whether the fee is included.
Building approval is separate from trade obligations
A building permit deals with regulated building work within its stated scope. It doesn't turn unlicensed plumbing or electrical work into licensed work. Moving drainage, altering water supply, installing new circuits or changing fixed electrical fittings creates trade-specific obligations that need the right licensed practitioners and their completion records.
Contractors sometimes compress this into a phrase such as fully compliant. That isn't enough detail for you to price risk. Ask the contractor to list building approval, plumbing approval and electrical certification as separate line items, even when one project manager coordinates all three. Then you can see whether a low total leaves an obligation for you to organise and pay for later.
Practical rule: If an approval affects the work, the quote should name who applies, who pays, who inspects and what document you'll receive.
Questions that depend on the property
Ask whether moving a toilet or shower triggers plumbing approval for your specific drainage alteration. Ask who appoints the surveyor, because responsibility for engagement and payment should be explicit before work starts. If the property is an apartment, ask whether owners corporation consent is required, particularly where work affects common property, waterproofing, waste stacks, noise hours or lift access.
Heritage controls add another layer. A project can look internal and still involve fabric, plumbing routes or external vents that need additional consent. Permit requirements can vary with zoning, heritage status and impacts on residential tenants, so a contractor shouldn't dismiss those checks based only on what happened at a different house. The answers to common renovation questions are a useful starting point, but your surveyor and relevant authority need to confirm the path for your address.
Pre-start checklist
- Confirm the permit path. Obtain written advice on whether a building permit is required for the proposed scope.
- Appoint the surveyor. Record who engages and pays the building surveyor.
- Confirm plumbing requirements. Identify drainage and fixture relocations before rough-in.
- Check property controls. Clear strata, heritage, tenancy and common-property requirements.
- Define close-out. Require the certificate of final inspection or completion records at handover where applicable.
- Price exclusions openly. List surveying, approvals, inspections and documentation as included or excluded.
The cheapest quote isn't necessarily the lowest-cost option if it excludes surveying, plumbing approvals, heritage coordination or close-out paperwork. Those costs don't disappear when a contractor omits them. They return as variations, delays or a handover file that can't prove how the work was signed off.
Waterproofing Rules Under the NCC and AS 3740
Think of a bathroom membrane as a raincoat. Sound fabric doesn't keep you dry if a seam is unzipped, a cuff is open or a pocket flap channels water inside. Bathroom waterproofing fails in the same practical way. The broad floor and wall surfaces matter, but corners, junctions, penetrations and thresholds need the closest attention because movement and detailing changes concentrate there.
The diagram below sets out that raincoat idea and the distinction between the membrane field and its seams.
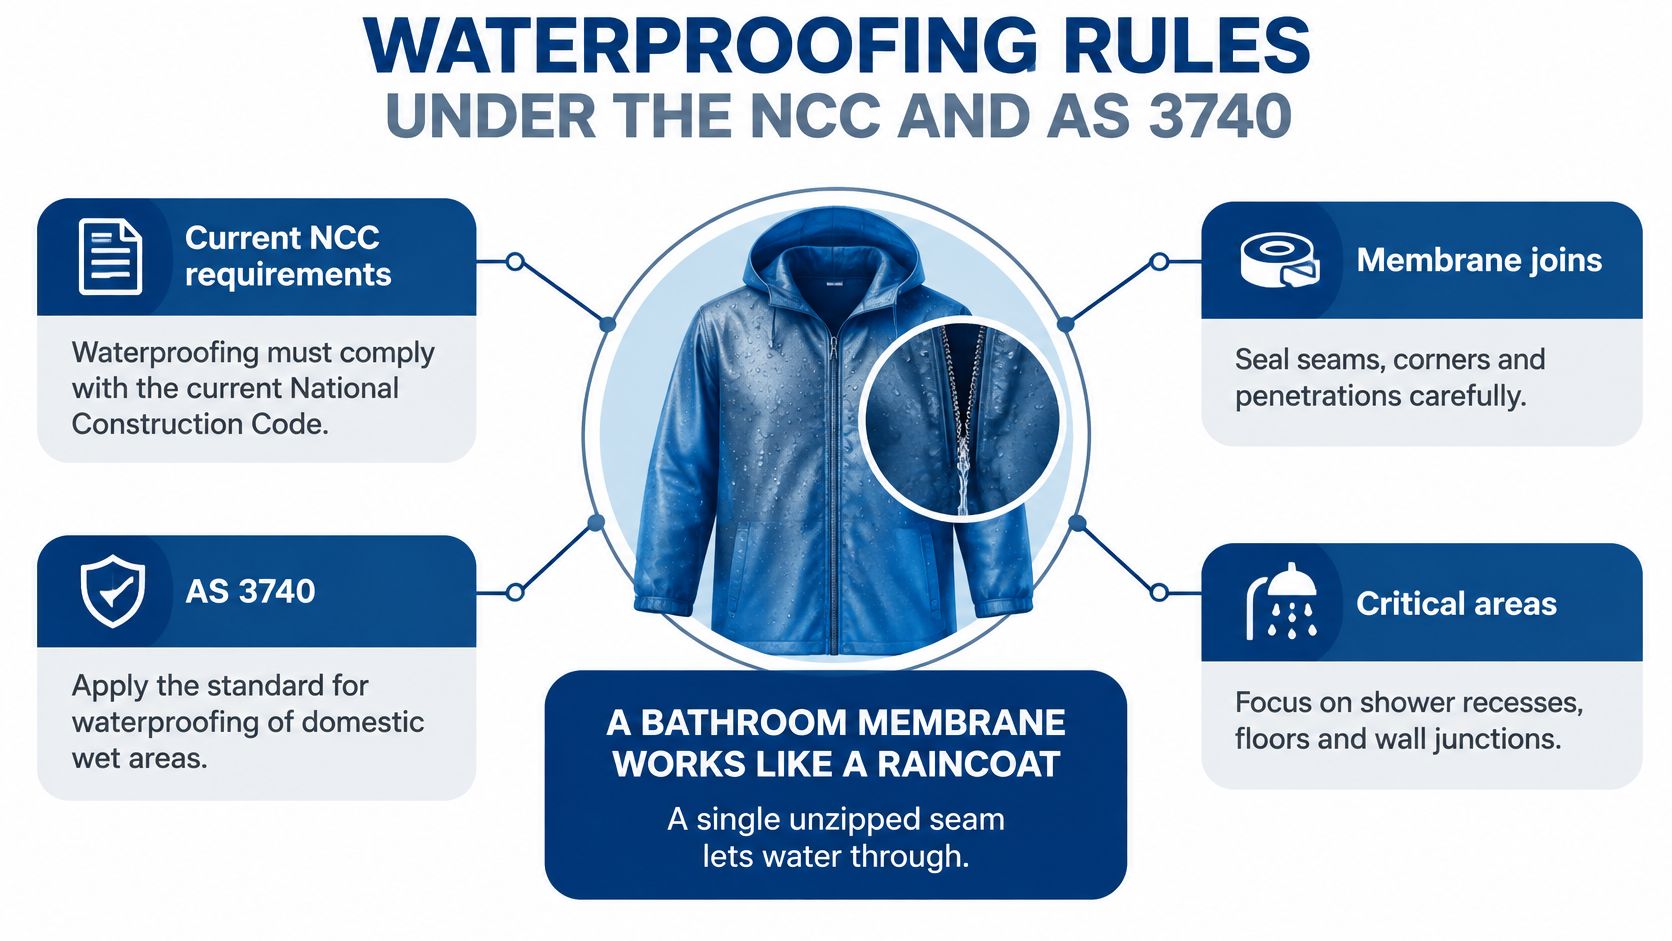
For residential work, design the system against the National Construction Code Housing Provisions and AS 3740. National Construction Code guidance on waterproofing houses states that shower floors must be waterproof, shower walls must be waterproof to at least 1800 mm above the floor substrate, and wall junctions, wall-to-floor junctions and penetrations must also be waterproof. It also identifies AS 3740 as a Deemed-to-Satisfy compliance pathway that must be combined with specified Housing Provisions clauses.
Where leaks usually begin
Pipe penetrations interrupt the membrane. Corners concentrate movement between planes. Thresholds combine changes in level, material and traffic. Wall-to-floor junctions can open when substrates move differently. A continuous-looking coating can still fail at those points if reinforcement, sealing or substrate preparation is wrong.
Older Melbourne homes add risk where timber floors deflect, previous leaks have damaged framing, or an earlier renovation left incompatible layers. Applying a new membrane over a soft, contaminated or uneven substrate doesn't restore the structure beneath it. The installer should expose and assess those areas, repair unsound material, and confirm that the membrane and tile adhesive form a compatible system.
The waterproofing system in order
- Substrate preparation. Repair, level and clean the surface so the membrane can bond consistently.
- Compatible membrane. Use a system compatible with the substrate and tile adhesive, applied to the manufacturer's requirements.
- Reinforced junctions. Treat corners and wall-to-floor junctions as movement and detailing zones, not ordinary coated surfaces.
- Sealed penetrations. Detail every pipe and fixture penetration before tiles conceal it.
- Waterstop or threshold. Install the specified transition so water is contained where the design requires it.
- Tile and grout. Treat tiling as the wearing surface, not as a substitute for the membrane beneath.
Tile and grout shed most surface water, but they don't replace the waterproofing system underneath.
Ask for a handover record before tiling starts. It should identify the membrane product and batch details, substrate condition, treated penetrations, waterstop or threshold arrangement and photographs before concealment. That record shows the waterproofing was built as a coordinated system and gives a future investigator evidence of details that can no longer be seen. If a contractor can't explain who photographs and records this stage, the quote is missing an important control.
Renovation Timeline From Strip-Out to Handover
A standard bathroom renovation usually takes roughly 3 to 6 weeks of working time. Calendar time can run longer when a custom screen, vanity or tile order is late, an approval takes longer than expected, or concealed damage changes the scope. The sequence matters as much as the total because several stages can't be inspected or corrected cheaply once the next trade covers them.
The timeline graphic below shows the main sequence from strip-out to handover.
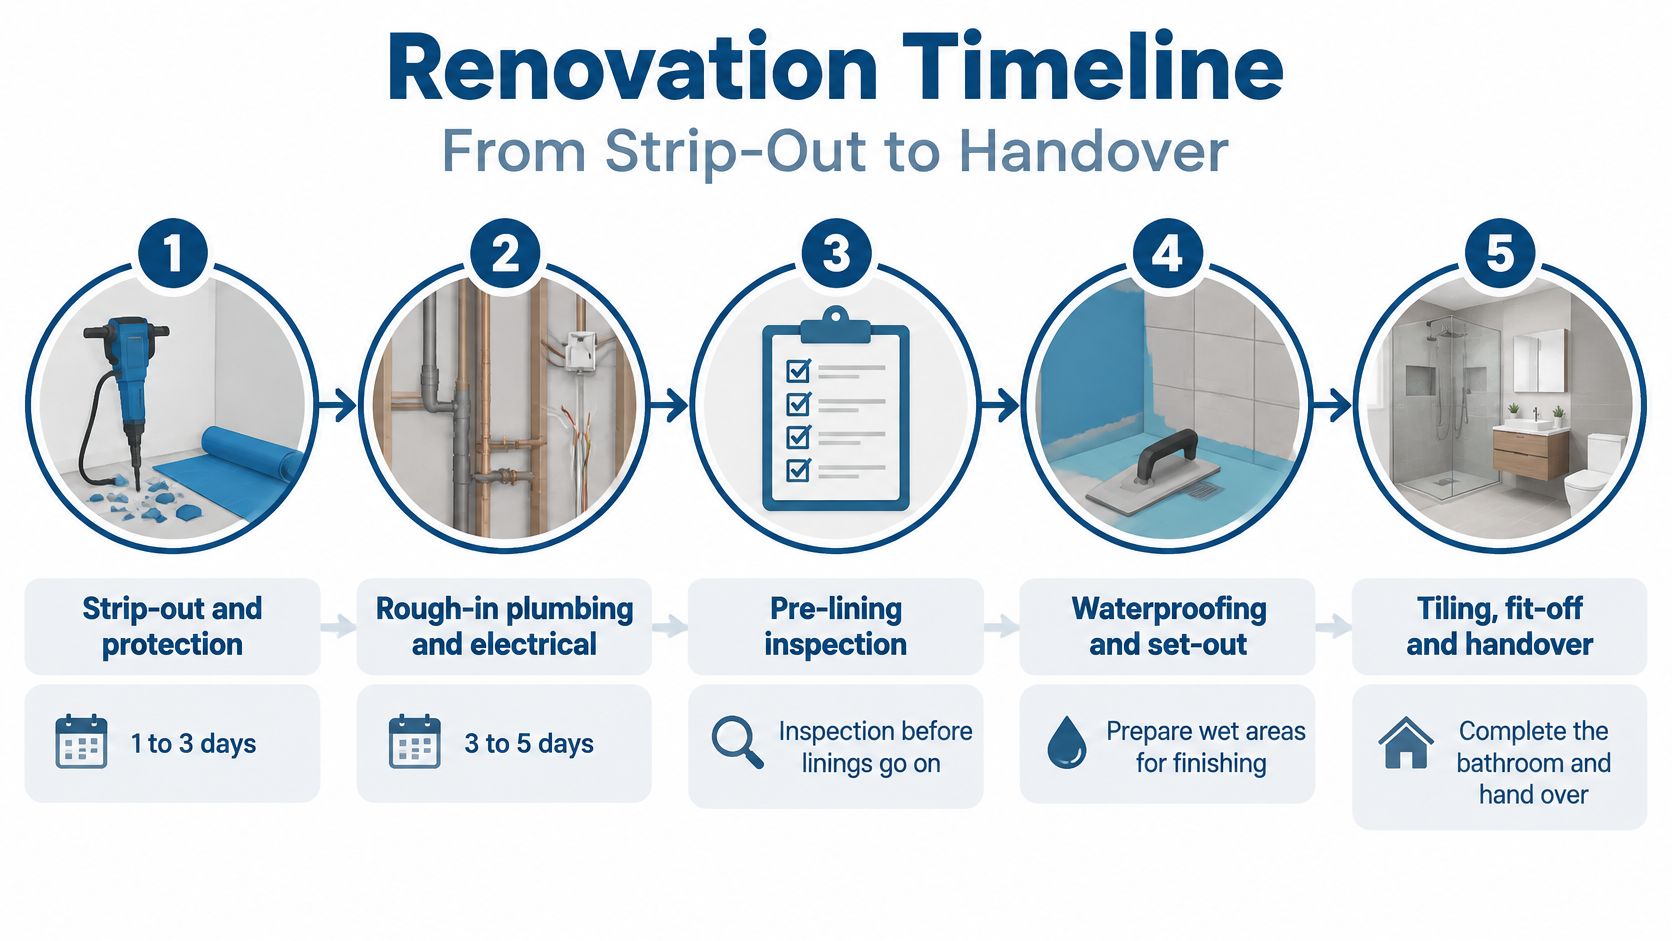
| Phase | Typical duration | Checkpoint before moving on |
|---|---|---|
| Strip-out and protection | 1 to 3 days | Floor and walls exposed, services located |
| Rough-in plumbing and electrical | 3 to 5 days | Pressure test and electrical rough-in checked |
| Pre-lining inspection | About 1 day | Inspection recorded before walls are closed |
| Waterproofing and curing | 2 to 4 days | Membrane and penetrations photographed, cure time met |
| Wall and floor tiling | 4 to 7 days | Falls checked, grout and sealant specified |
| Vanity, screen and fixtures | 2 to 4 days | Silicone seals and tapware tested for leaks |
| Painting, sealing and final clean | 2 to 3 days | Handover documents and warranty issued |
Strip-out protects adjoining rooms, isolates services and exposes the original substrate. Rough-in then sets drainage, water, power and lighting while access remains open. The pre-lining checkpoint is your last low-cost chance to correct pipe locations, noggins for accessories, cable routes and fixture centre lines.
Waterproofing shouldn't be compressed to recover earlier slippage. The installer needs the membrane product's specified curing time, and tiling over it too early risks the system. Tiling then depends on correct falls, a workable set-out and movement joints. Fit-off follows with the vanity, toilet, screen, tapware and accessories, after which each fitting needs leak testing and careful sealing.
The short video below is useful for visualising how those phases connect on site.
Say a 1960s Hawthorn bathroom has its shower relocated. Strip-out exposes water-damaged floor framing, the plumber revises the waste route, and the pre-lining inspection requires a correction before sheeting. Waterproofing starts later, the tiler loses the booked start date, and the measured shower screen can't be ordered until tiling is complete. One failed checkpoint therefore moves several later dates, even though the correction itself is small. Build your expectations around those dependencies, not just the number of trade days.
Choosing a Contractor and Comparing Quotes
Start by asking who manages the whole project. A trade-led arrangement can split plumbing, electrical work, carpentry, waterproofing and tiling across separate businesses. That can work when you have time and technical confidence, but it can also leave scheduling, junction details and documentation without a single owner. For Bathroom Renovations Melbourne projects involving several trades, I would favour one clearly accountable project manager unless you're prepared to coordinate inspections and variations yourself.
Verify each relevant licence and registration, including building practitioner registration where the scope requires it. Ask for references from recent Melbourne jobs with a similar property age and layout change. A contractor who mainly refreshes bathrooms on their existing footprint may not be the right fit for a slab drainage relocation or apartment common-property constraints.
As one written benchmark, Elite Bathroom Renovations Melbourne states 10-year waterproofing cover, 10-year structural cover and 2-year minor defect cover. Use that structure to ask other contractors what periods apply to each category, who stands behind the warranty, and what defects process you'll follow. Don't accept a single warranty number without knowing what it covers.
Compare the same written scope
Price at least three quotes against one scope list. Include strip-out, disposal, substrate repairs, waterproofing, junction treatment, penetrations, plumbing, electrical work, tiling, fixtures, approvals, inspections, close-out records and warranty terms. Mark each item included, excluded or provisional. This discipline helps you avoid common bathroom renovation mistakes such as comparing a complete managed price with a partial trade price.
| Quote item | Ask the contractor to state | Why it matters |
|---|---|---|
| Building permit and surveyor | Who appoints the surveyor and who pays for it | Permit gaps leave the work uncompliant |
| Plumbing approval | Whether moving a toilet or shower is priced and approved | Plumbing work is licensed trade work, not building work |
| Waterproofing record | Membrane product, treated penetrations, photographs before tiling | Leaks start at junctions and penetrations |
| Strip-out and disposal | Whether demolition and removal are included | Often excluded from low quotes |
| Warranty | Waterproofing, structural and minor defect periods in writing | Sets the benchmark for comparing cover |
| Close-out documents | Certificate of final inspection or completion records at handover | Proves the work was signed off |
| Payment milestones | Payments tied to completed phases | Limits exposure if work stops |
Set your budget band from the scope you need, then add a 10 to 15 percent contingency for concealed damage. Rotten framing, failed substrates and undocumented plumbing can't always be priced accurately before strip-out. A contingency doesn't authorise uncontrolled spending. Require a written variation, price and time effect before extra work proceeds.
Avoid a large upfront deposit. Tie payments to completed and inspectable phases, such as strip-out, rough-in, waterproofing, tiling and final handover. Reject a quote that excludes surveying, plumbing approvals, strip-out or disposal without pricing those items elsewhere. The missing amount will still be paid by someone, usually you, and often under time pressure.
A written exclusion is useful information. An unmentioned exclusion is where budget blowouts begin.
Before signing, get the handover records, warranty periods, variation process and payment milestones into the contract. Then ask three direct questions.
- Who pulls the permits? Name the person or business responsible for building and plumbing approvals.
- Who records the waterproofing? Confirm product details, penetration records and pre-tiling photographs.
- What happens if inspection fails? Establish who corrects the work, who pays and how the programme changes.
Clear answers won't guarantee a trouble-free renovation. They will show whether the contractor has a system for the points where bathrooms commonly become expensive.
If you're planning a bathroom upgrade and want the layout, waterproofing, licensed trades, approvals and handover records coordinated under one written scope, contact Elite Bathroom Renovations Melbourne to discuss your room, budget band and preferred finish level. Bring your measurements, photos and must-have fixtures, and ask for the inclusions, exclusions, warranty terms and payment milestones in writing before you commit.
