

The tile is usually the smallest risk in a Melbourne bathroom renovation. What sits under it, the membrane, the floor falls and the condition of the substrate, carries most of the budget and decides whether the room stays dry in five years.
A compact ensuite on a sound slab can be a straightforward job. A bathroom with damaged flooring, awkward drainage or a waterproofing system of unknown age needs a wider scope, even when both rooms take the same tile. For tiling works in Melbourne bathroom renovations, the question worth asking is what has to be repaired, prepared and documented before laying begins.
Table of Contents
- Melbourne Bathroom Tiling Costs at a Glance
- Choosing Tiles That Suit Melbourne Bathrooms
- How Tiling Fits Into the Renovation Sequence
- Floor Falls and Substrate Preparation
- Waterproofing Before a Single Tile Goes On
- Spotting Defects After the Tiles Are Down
- Questions to Ask Before You Sign With a Tiler
Melbourne Bathroom Tiling Costs at a Glance
Australian tile supply sits at $35 to $120 per m² and tiling labour at $50 to $70 per m², according to HIA Bathroom Renovation Cost Guide figures cited by MyHomeware's bathroom renovation cost pricing guide for 2025. Applied to a hypothetical 6 m² floor, those rates produce $210 to $720 for tiles and $300 to $420 for labour.
That arithmetic covers the tile and the hands laying it. Adhesive, grout, trim, screed, membrane and drainage work all sit outside a per-metre rate, and the condition of the substrate determines how much of them a job needs.
Why the base changes the quote
A small floor isn't necessarily a cheap floor. Removing tiles can expose loose sheeting, deteriorated timber, an unsuitable screed or a waste that sits too high for the proposed finish. Those aren't extra tile-laying tasks. They're repairs that need their own allowances, and they routinely cost more than the visible tiling does.
Established bathrooms carry this risk more often. In the 1999 Australian Housing Survey, the Australian Bureau of Statistics found that 61% of dwellings aged 20 years or more had been renovated during the preceding decade, compared with 49% of dwellings less than 10 years old. Older housing stock has usually been worked on before, which means finishes may sit over earlier repairs, mixed substrates or dated plumbing rough-ins.
Ask the contractor to separate tile supply, laying, membrane installation, falls, demolition and making good. I'd treat a single lump sum that bundles all of it as a quote written before anyone looked under the tiles. The tile itself is seldom the part that lets water through later.
Use the table below as the starting point for comparing quotes.
Melbourne bathroom tiling cost components
| Cost item | Typical range | What it covers |
|---|---|---|
| Tile supply | $35–$120 per m² | Tile only, before adhesive, grout and trim |
| Tiling labour | $50–$70 per m² | Setting, grouting and cleaning off |
| Example 6 m² floor, tile only | $210–$720 | Tile supply calculated at the per-metre range |
| Example 6 m² floor, labour only | $300–$420 | Labour calculated at the per-metre range |
| Waterproofing, falls and waste relocation | Priced separately | Excluded from the basic per-metre comparison |
| Full bathroom tiling project | Itemised sum of the items above | Total scales with tiled area, substrate condition and any drainage or membrane work |
Choosing Tiles That Suit Melbourne Bathrooms
Choose tiles early enough for the tiler and plumber to influence the decision. Material, format and thickness affect the base preparation, drain detail and finished floor height. A showroom sample won't tell you whether the proposed tile can follow your shower's drainage geometry.
The main options involve different compromises:
- Porcelain: Its low water absorption and durability make it a useful choice for wet floors and busy bathrooms. Dense porcelain also needs suitable cutting equipment and an adhesive specified for the tile and substrate.
- Ceramic: Often a more economical wall finish, ceramic can be easier to cut around fittings. Don't assume a wall tile is suitable for the floor, or that every ceramic product will tolerate the same wear.
- Large-format tiles: Fewer grout lines create a quieter finish, but the base must be accurately prepared. Tiles can bridge changes in slope around a point waste, requiring planned cuts rather than an oversized adhesive bed.
- Mosaics: Small pieces can follow a shaped shower floor more readily. Their many joints increase cleaning work, and some grout products need sealing while others don't. Check the product specification rather than sealing everything automatically.
Check performance, not just appearance
Ask the supplier for the wet-floor slip-resistance classification in writing and have the designer or contractor confirm suitability for the intended location. A textured sample that feels secure when dry isn't a reliable wet-floor assessment. Equally, an aggressively textured floor can be harder to clean, particularly where soap residue collects.
Bring home a sample and inspect it under the bathroom's lighting. Check how the surface shows water marks and how the proposed grout colour looks beside it. For mosaics, inspect the sheet backing and ask whether the adhesive system is compatible with it.
Practical rule: Choose the format the substrate and drainage layout can support, not just the one that looks best on a display wall.
Tile thickness matters at doorways, shower entries and wastes. The tiler needs to coordinate the tile and adhesive build-up with the plumber's drain setting, rather than discovering a mismatch after rough-in.
Give the tiler the actual tile specification before plumbing positions are finalised. A product name, sample and thickness measurement are more useful than a photograph of a similar bathroom.
How Tiling Fits Into the Renovation Sequence
Keeping the room layout doesn't remove the need for coordination. Reporting on Australian bathroom renovations in 2022/23 found that almost 80% retained the existing footprint, according to Sourceable's coverage of HIA findings.
Tiling is the last hard finish in the wet area. Concealed work must be ready before the tiler closes it in, as this process overview illustrates.
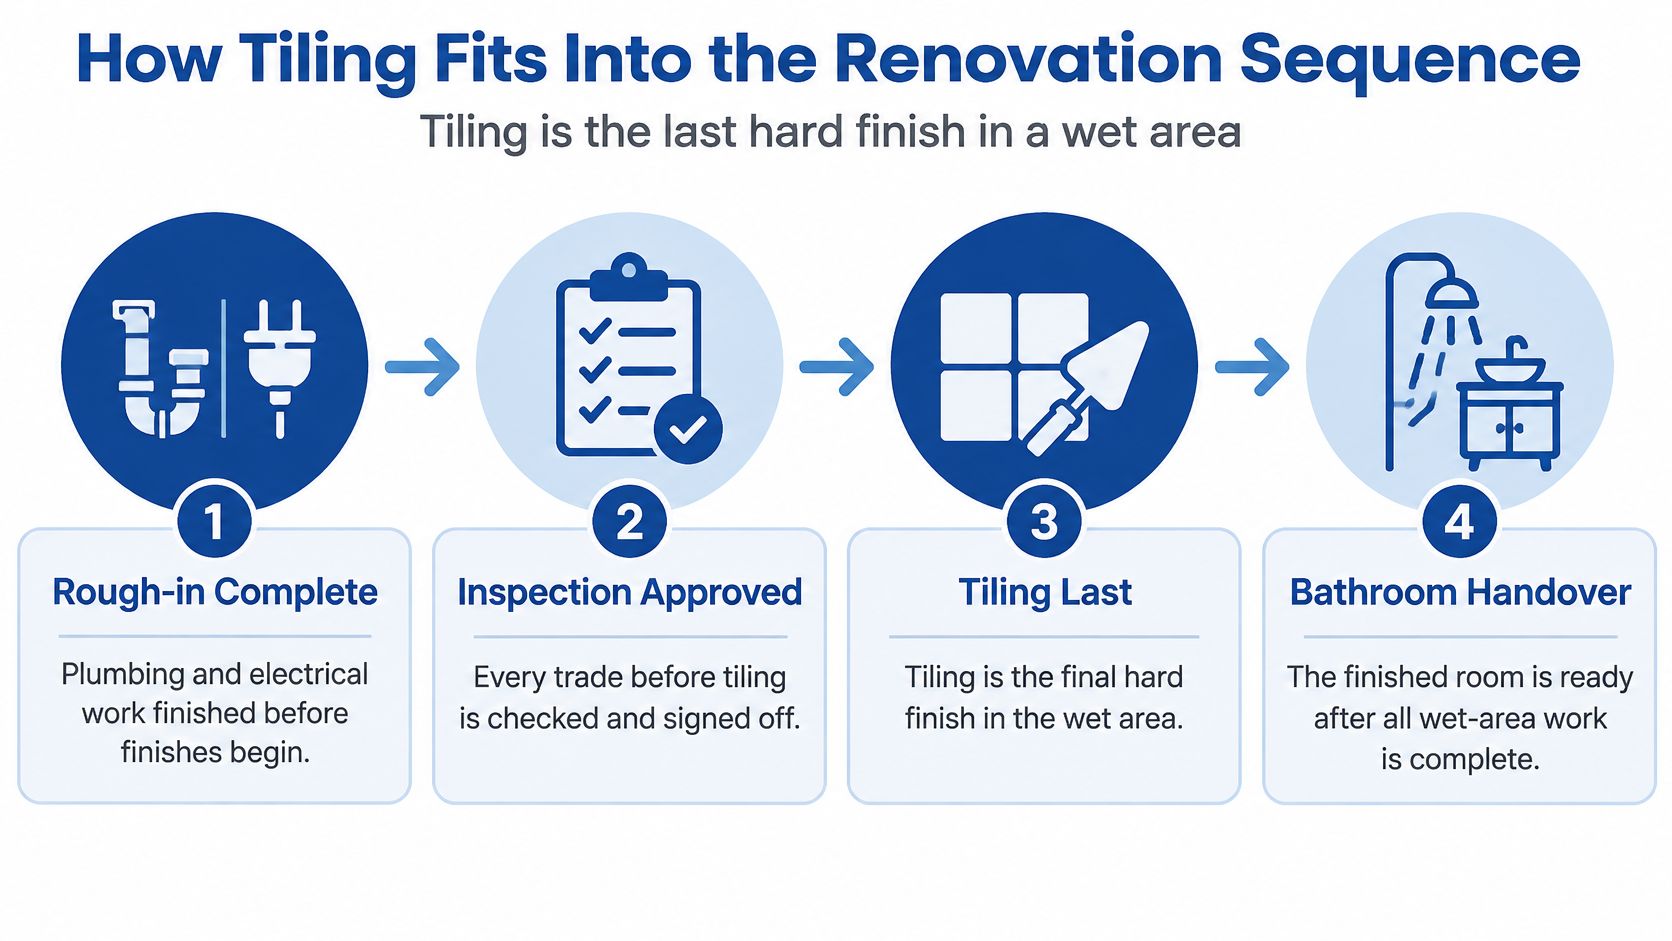
Agree the hold points before demolition
- Strip out and inspect. Expose enough of the base to assess its condition. Pricing repairs without inspecting hidden damage leaves the scope uncertain.
- Complete rough-in. Confirm plumbing and electrical positions, including waste height against the selected finish. Guessing from an unfinished floor can put fittings in the wrong place.
- Repair framing and install sheeting. Fix movement, damaged members and unsuitable linings before covering them. New tiles won't stabilise a flexible floor.
- Form the drainage falls. Prepare the substrate or screed to the approved drainage layout. Don't leave the geometry for the tile adhesive to resolve.
- Install and cure the membrane. Use the specified system and respect its curing conditions. A dry-looking surface isn't proof that it's ready to cover.
- Complete specified testing. Where the contractor's procedure includes flood testing, agree the method and timing with the waterproofing installer. Don't improvise a test before the membrane is ready.
- Lay the tiles. Set out cuts, fixtures and edges before fixing begins. Poor planning can leave narrow slivers beside prominent fittings.
- Grout after adhesive curing. Allow the adhesive to develop properly before loading or grouting the installation. Use sealer only where the selected tile or grout requires it.
- Fit off and finish flexible joints. Coordinate fixtures, screens and compatible silicone. Premature shower use can compromise uncured materials.
A written bathroom renovation plan for Melbourne homes should identify who releases each hold point. If an earlier trade runs late, move the tiler's booking rather than deleting inspection or curing time to recover the schedule.
Floor Falls and Substrate Preparation
Form falls in the substrate or screed, not by improvising with tile adhesive. Australian inspection guidance citing AS 3740 identifies a general wet-area minimum fall of 1:100 toward the waste, equivalent to 10 mm per metre, in the Western Australian inspection guide. The contractor must still confirm the applicable requirements for the particular shower, drainage layout and approved design.
For a hypothetical shower floor using that gradient, the calculation is straightforward:
| Shower length | Calculated level change at the stated gradient |
|---|---|
| 0.9 m | About 9 mm |
| 1.2 m | About 12 mm |
| 1.5 m | About 15 mm |
These are arithmetic examples, not instructions to apply the same design to every bathroom. The location of the waste, the shower boundary and the adjoining finished floor all affect how the contractor forms the surface.
Flat and sloping aren't opposites
A shower floor can have a consistent slope while remaining flat within each drainage plane. Problems arise when the base has humps, hollows or abrupt changes that the chosen tile can't follow.
Too little fall leaves water behind. Uneven or excessive slopes can produce uncomfortable footing, lippage and awkward screen interfaces. With a point waste, larger tiles may need envelope cuts so each section follows the drainage planes without projecting corners.
The tiler should inspect the prepared surface with a straightedge and laser level before waterproofing. Mark the waste level, perimeter levels and transition through the shower entry. Check for reverse falls at corners rather than measuring only along the centre.
A suitable tile adhesive bonds the tile to a prepared base. It isn't a substitute for designing the floor underneath it.
On timber floors, check for flex, loose fixings and damaged sheets before adding a screed or membrane. On concrete, remove contaminants and assess cracks rather than coating over them. Preparation must suit the selected membrane and adhesive system.
Finally, coordinate the waste flange, tile thickness and adhesive bed so the finished tile drains into the outlet. Confirm the waterstop positions and entry detail without introducing an unplanned trip edge.
Ask for the level checks and photographs before the membrane hides the preparation. Those records are far more useful than an assurance after the bathroom is finished.
Waterproofing Before a Single Tile Goes On
Tiles and grout aren't the primary waterproof barrier. The membrane protects framing and subfloors when water passes through or around the finish. A sound-looking tiled surface can conceal gaps at a pipe penetration, an untreated junction or an interrupted membrane.
Membrane application needs a prepared base and a complete detailing system, not just a coat of coloured liquid.
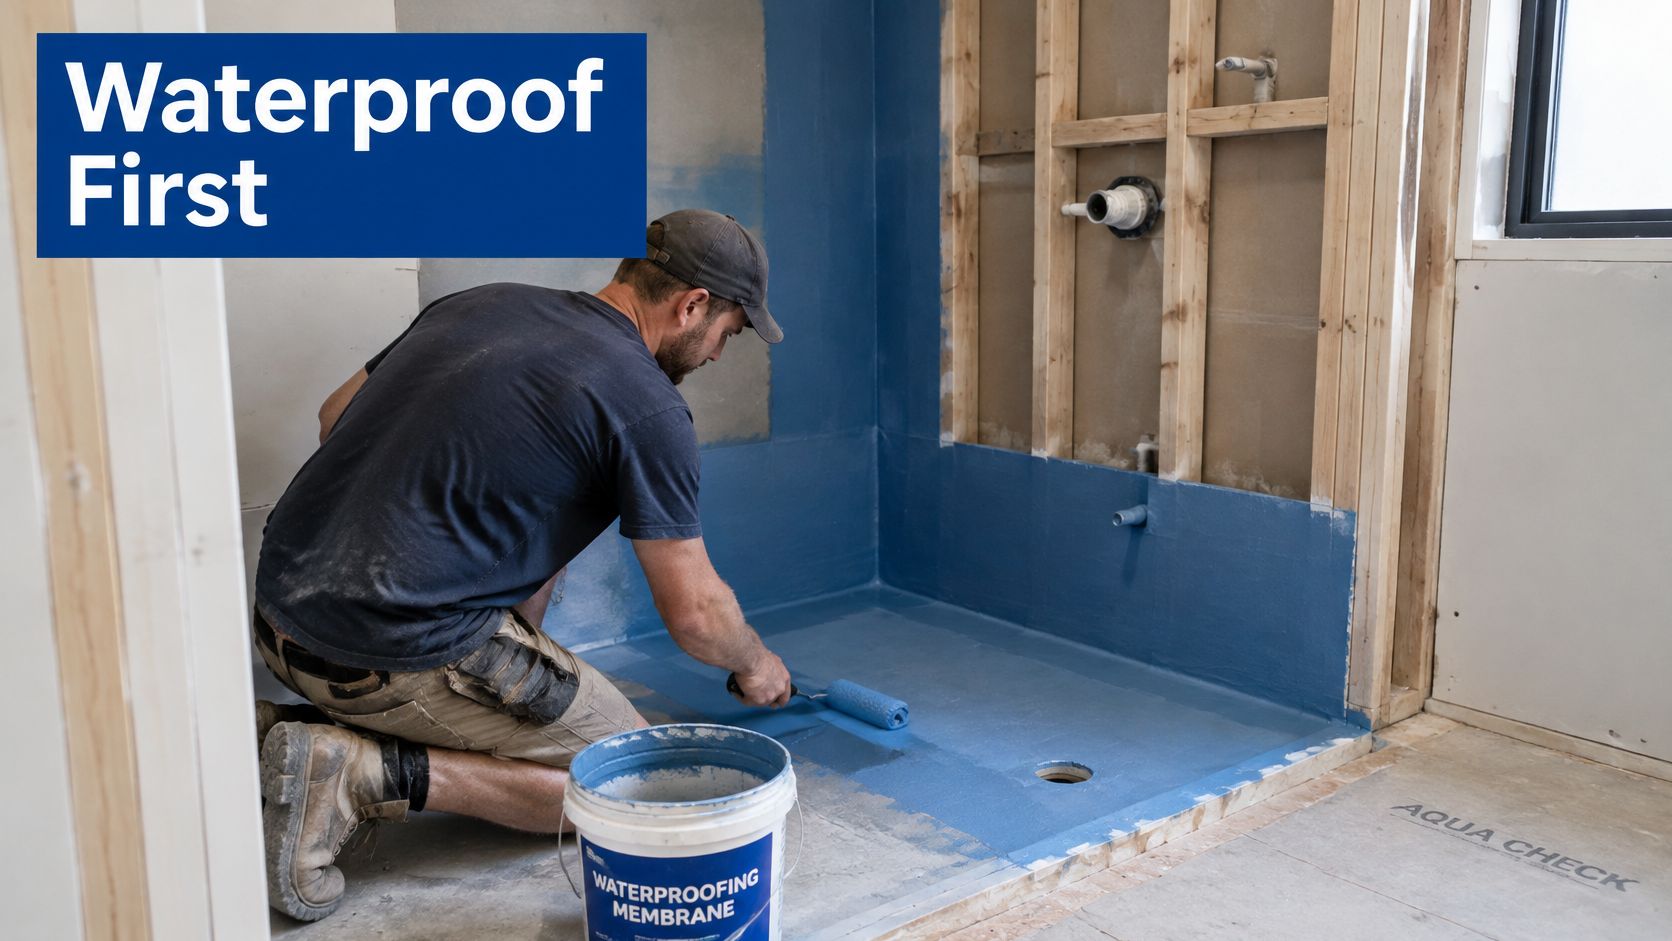
Specify the whole system
AS 3740, Waterproofing of domestic wet areas, addresses wet-area floors, walls, junctions and penetrations; the associated requirements summarised for this work include shower-wall waterproofing to at least 1,800 mm above finished floor, with applicable base detailing of 150 mm above the shower floor or 25 mm above maximum retained water. These aren't interchangeable wall heights, so the contractor must show which detail applies and confirm the currently applicable standard and NCC provisions.
Waterproofing extent and requirements by shower and detail
| Area or detail | Requirement | Why it matters |
|---|---|---|
| Enclosed shower walls | Full specified shower-wall waterproofing height | Protects the wall behind the wet finish |
| Minimum height in a shower | Applicable upturn or retained-water detail | Prevents water bypassing the base junction |
| Unenclosed shower floor | Designed waterproofing radius with a waterstop at its boundary | Removing containment changes the protected area |
| Service penetrations | Sealed before tiling | Closes a common route behind finishes |
| Floor waste | Shower floor waste connected to the membrane system | Directs water into drainage |
| Movement-prone junctions and door thresholds | Specified bond breakers and waterstops | Accommodates movement and contains water |
| Corners and horizontal junctions | Continuous treatment without gaps | Maintains the barrier through changes of plane |
Don't combine primers, membranes and adhesives casually. The installer should verify compatibility and record product names, application requirements and curing conditions. Bond breakers allow the membrane to accommodate movement at specified junctions rather than being stretched tightly across them.
Make the inspection a hold point
Before tiling, check:
- Substrate readiness: Sound, clean, properly fixed and suitable for the system.
- Membrane installation: Required coverage, continuity and manufacturer-specified application thickness.
- Critical connections: Pipe seals, waste or puddle-flange connection, corners and threshold waterstops.
- Evidence: Dated photographs, product records and the agreed pre-tile inspection.
Use the demonstration below to understand the application process, not as a substitute for the project's specification.
Rectification after tiling can involve removing finishes and disturbing plasterboard, cabinetry or adjoining flooring. That's why inspection must happen while the membrane remains visible. A neat tile installation doesn't prove that the concealed system complies.
Spotting Defects After the Tiles Are Down
Defects can appear months after handover, and the visible symptom doesn't establish the cause. Hollow tiles, recurring mould and damp skirtings need investigation, not an immediate assumption that the tile itself has failed.
Tiling symptoms, likely causes and next steps
| Symptom | Likely cause | Next step |
|---|---|---|
| Hollow or drumming tiles | Possible adhesive bond failure or substrate movement | Map the affected area and arrange independent inspection before removal |
| Loose or lifting tiles near the door | Substrate flexing or moisture damage, potentially involving a missing threshold waterstop | Notify the contractor and raise suspected compliance issues with the building surveyor |
| Cracked grout at wall-to-floor junction | Movement or an unsuitable rigid junction detail | Record the location and inspect the flexible-joint detail |
| Staining or mould at shower base | Poor drainage, moisture tracking or ventilation problems | Photograph it, then assess drainage and moisture sources |
| Damp wall or musty smell behind tiles | Possible membrane discontinuity or plumbing leak | Report in writing and obtain advice before destructive testing |
| Pooling water on the shower floor | Insufficient or local reverse fall | Have levels measured and recorded |
These are investigation leads, not diagnoses. A hollow sound alone doesn't establish failure, and a damp wall may require plumbing checks before anyone opens the waterproofing.
The following checklist helps distinguish the areas an inspector may need to investigate.
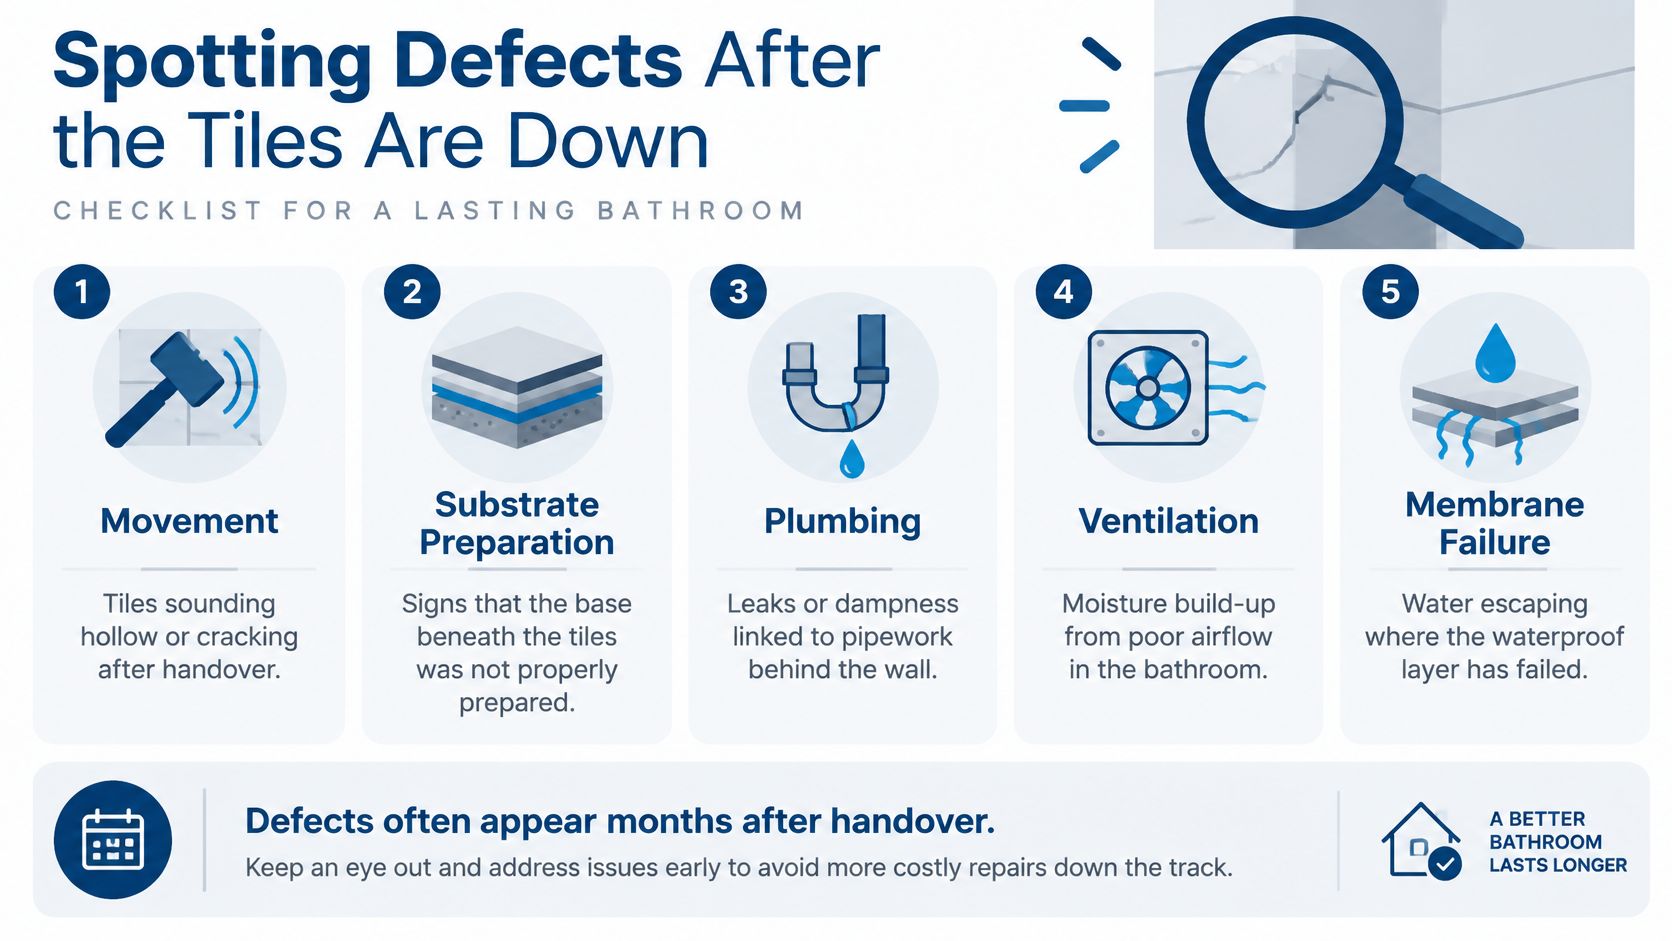
Inspect while evidence is available
Use a staged inspection routine:
- Before tiling: Retain records of the base, drainage preparation and exposed membrane.
- Immediately after completion: Photograph edges, joints, cuts and visible damage before normal use.
- After the first several wet weeks: Look for persistent pooling, staining, loose finishes and moisture outside the shower.
- Before the applicable warranty period ends: Review unresolved concerns and submit them in writing rather than relying on a telephone conversation.
Victoria's Building and Plumbing Commission guidance on concerns about building work advises owners to raise concerns during construction and follow up in writing, distinguishes building-law compliance from contractual quality, and describes reform provisions allowing rectification orders during construction and for up to 10 years after practical completion. Don't treat that enforcement window as a blanket product warranty or assume every defect follows the same process.
Keep the complaint and evidence together
The building surveyor assesses building-law compliance. The contractor remains responsible for contractual promises and workmanship obligations, so identify whether you're reporting suspected non-compliance, a contract defect or both.
Keep the contract scope, product data, progress photographs, invoices, permits, inspection notes and written complaints. Photograph active staining before cleaning, then manage moisture safely without obscuring the evidence unnecessarily.
Don't cut out suspect tiles before obtaining independent advice. You may damage the membrane and remove evidence needed to identify the original fault.
Avoiding common bathroom renovation mistakes includes keeping responsibility clear after handover. A tile warranty doesn't cover every leak. Separate the tile, adhesive, grout, waterproofing, plumbing and structural issues before asking for a remedy.
Questions to Ask Before You Sign With a Tiler
A quote is ready to sign when the contractor has defined the work, exclusions, inspection points and responsibility for hidden conditions. A low total without those details isn't a reliable comparison.
Shower geometry deserves explicit treatment. Victoria's Building and Plumbing Commission wet-area guidance explains that an unenclosed shower's waterproofed floor extends to a 1,500 mm horizontal radius from the shower rose, with a waterstop at the boundary and waterproofing continuing back to the waste. Removing a screen can therefore change more than the appearance.
Put these questions in the quote request
- What's included? Ask for separate allowances for tiles, labour, membrane, falls, waste relocation, demolition and making good. Require an approval process for concealed repairs.
- Who designs the waterproofing? Request the applicable standard, system specification and a drawing showing wall coverage, junctions and penetrations.
- How is the shower classified? Confirm whether it's enclosed, semi-enclosed or unenclosed, and have the contractor mark the waterproofing boundary on the plan.
- Who owns drainage preparation? Name the person responsible for forming, measuring and recording falls before waterproofing.
- Are the selected tiles supported? Confirm format, thickness, substrate suitability, cuts and the proposed waste connection.
- What evidence will you receive? Include a pre-tile inspection, dated photographs and product information in the handover requirements.
- Are credentials current? Check relevant licences or registrations, insurance and any bonding arrangements represented in the proposal.
- What does the warranty cover? Ask for written terms separating waterproofing, structural work and minor defects, including exclusions and the claims process.
Use your Melbourne bathroom renovation brief to assign each responsibility to a named contractor. Don't assume the building surveyor will determine whether the contractor delivered every promised finish.
Before paying any deposit, request the written scope, line-item quote and inspection schedule together. If an essential detail remains unresolved, have it settled in writing before committing.
Elite Bathroom Renovations Melbourne offers bathroom renovation work with tilers, plumbers and other trades on its team. Visit to discuss your bathroom's tile selection, substrate preparation and waterproofing scope, and request an itemised proposal with inspection points before work begins.
